Learning Webpack With Vue.js
Both React and Vue.js bring to the table the marvels of creating front-ends based on components and reactivity and while React seems to be the more popular choice (specially in the commercial sense), it depends on a lot of tools to just work and this can be a huge drawback for those trying React for the first time. Vue on the other hand is extremely versatile, allowing students to start using it without the help of any special tool at all. The most important aspect of why someone would learn React concepts through the study of Vue is that:
Vue can be used with the same tooling as React, but for Vue, they are not a requirement and can be progressively adopted.
This progressive adoption makes it much easier to understand how and why to use tools like Webpack or Babel. This is especially important because each of those tools have their own learning curves and concepts to be absorbed and joining them all in the same workflow just to get a hello world will be quite confusing.
A Hello world with Vue⌗
Getting started with Vue is almost effortless.
Let’s start by creating a simple HTML file:
<!DOCTYPE html>
<html>
  <head>
    <meta charset=”utf-8">
    <title>A dead simple Vue application</title>
  </head>
  <body>
    <h1>Greetings</h1>
  </body>
</html>
Now we can add some of Vue’s secret sauce on it:
<!DOCTYPE html>
<html>
  <head>
    <meta charset=”utf-8">
    <title>A dead simple Vue application</title>
 </head>
  <body>
    <h1>Greetings</h1>
    <div id=”app-container”> {{information}} </div>
  </body>

  <script src=”https://cdnjs.cloudflare.com/ajax/libs/vue/2.3.4/vue.min.js" charset=”utf-8"></script>

  <script type=”text/javascript”>

    // Here's where the magic happens:

    new Vue({
      el: “#app-container”,
      data: { information: “Some content” }
    });
  </script>
</html>
After just adding the minified Vue from a CDN and starting it with a simple new, Vue is already working and delivering something more less like this:

A Hello World with React⌗
For the sake of simplicity we can try this by using create-react-app, although some decisions made by the tool may be a mystery by now.
- First, we should install node.js and npm.
- The node installer will also take care of installing Npm for us, so there’s no need to worry about it
Then we can install create-react-app itself:
npm install -g create-react-app
Create a project named hello world:
create-react-app hello-world
Which will generate a project with a structure more less like:
.
├── .gitignore
├── README.md
├── package.json
├── public
│ ├── favicon.ico
│ ├── index.html
│ └── manifest.json
├── src
│ ├── App.css
│ ├── App.js
│ ├── App.test.js
│ ├── index.css
│ ├── index.js
│ ├── logo.svg
│ └── registerServiceWorker.js
└── yarn.lock
Start the project to see some hello world:
yarn start
Yarn is a tool created by Facebook as well it’s an alternative to npm. This command will start a server that will reload the application at every change made in its code.
After those four steps, it should be possible to get create-react-app’s hello world:

Let’s quickly look around the project’s code. First, let’s peek into src/App.js:
 import React, { Component } from 'react';
  import logo from './logo.svg';
  import './App.css';

  class App extends Component {
    render() {
      return (
        <div className="App">
          <div className="App-header">
            <img src={logo} className="App-logo" alt="logo" />
            <h2>Welcome to React</h2>
          </div>
          <p className="App-intro">
            To get started, edit <code>src/App.js</code> and save to reload.
          </p>
        </div>
      );
    }
  }

  export default App;
Looks quite simple as well, but there are key aspects to be noticed here:
Features like
import,classandexportbelong to theES6/2015 specification, which means that this code will need to be transpiled to plain JavaScript at some point;The render function is returning some sort of HTML, what is that? That’s JSX, some sort of sublanguage that serves as a syntax sugar to React’s API to create DOM elements. This also needs to be transpiled;
svgandcsscan be imported? How so? This is a capability provided by a bundling tool, such as Webpack;As opposed to Vue, the responsibility of how components are shaped goes to the JavaScript instead of HTML.
All this is really nice, but it’s also very scary in a first glance, there’s a lot of disruptive changes to what people were used to when developing JavaScript things. ES6? Importing a CSS? How the hell does all this works?
Hey, where is my configuration?⌗
Well,package.json usually gives some good indications regarding how a node.js project (like the one generated by the create-react-app
tool) is configured, let’s look at it to see how things are being transpiled and bundled:
{
  “name”: “hello-world”,
  “version”: “0.1.0”,
  “private”: true,
  “dependencies”: {
    “react”: “15.6.1”,
    “react-dom”: “15.6.1”,
    “react-scripts”: “1.0.10”
   },
  “scripts”: {
    “start”: “react-scripts start”,
    “build”: “react-scripts build”,
    “test”: “react-scripts test --env=jsdom”,
    “eject”: “react-scripts eject”
   }
}
Damn it, a magical react-scripts is doing everything, that’s only useful to people that already know what’s going on.
Let’s gear up with Vue.js⌗
We do know that Webpack and Babel are required in order to work with React, but we can also use them with Vue, and that makes it much easier to understand things.
Since we’re going to use Vue with Webpack and other fancy stuff, we can use some cool superpowers, like Single File Components.
Setting up Webpack⌗
In order to catch a glimpse on how Webpack works and why a project could benefit from it, we will create another astonishing Hello World project, but this time it will use Webpack to transpile and bundle Vue written in the Single File Component way.
It all begins with a new node.js project
mkdir -p webpack-hello-world/src; cd webpack-hello-world; npm init
Npm init will ask a few questions, you can just skip them by pressing enter. After all the interrogation, you will end up with the package.json file, which is responsible for keeping a few meta information about the project, like required dependencies, maintainers, script aliases and some configuration (some times). Npm is very useful, serving as a simple and efficient build tool that is perfect for small to medium sized projects.
Let’s take a look on what we have so far:
.
├── app
└── package.json
The app folder is where all the code will reside, and its name is not mandatory, so a developer can call it whatever they like.
Creating the hello world component⌗
Once we’re inside our new majestic project, we can start working in our Vue component. Let’s first create a file for it:
Notice the use of the .vue extension. This is useful for a bunch of things, like:
- Keep things organized
- Automatically apply syntax highlighting and code completion
- Identify files on Webpack configuration (more about that ahead)
If you use Atom, for instance, you can install some handy plugins:
apm install language-vue language-vue-component vue-autocomplete
Let’s make HelloWorld happen again by filling our HelloWorld.vue file with some code:
 <template>
    <div>
      <h1>Greetings</h1>
      <p>{{information}}</p>
   </div>
  </template>

  <script charset=”utf-8">
    export default {
     data: {
       information: ‘Some content’
     }
    }
  </script>

  <style>
    h1 {
      color: red;
    }
  </style>
But hey! In college they always told me to separate concerns! Why put different things in the same file?
Well, as Vue maintainers believe, you can separate concerns without separating files, and I personally believe that this makes sense in a few scenarios and this is one of them, since all the code related to a single component will be in the same place at the same time that they remain components, relatively isolated from each other.
We still need to initialise Vue and tell it to render our component. For that, let’s create a separate file that will be the starting point of our app.
The main.js file⌗
In a fresh empty file:
touch app/main.js
Let’s initialise Vue:
 import Vue from 'vue'
  import HelloWorld from './HelloWorld.vue'
  new Vue({
    el: '#vue-container',
    render: handler => handler(HelloWorld)
  })
Right, we have fancy pants single file components, now what?
This is where most complexity begins for both React and Vue: transforming all the fanciness into plain old readable JavaScript, HTML and CSS.
Hello Webpack⌗

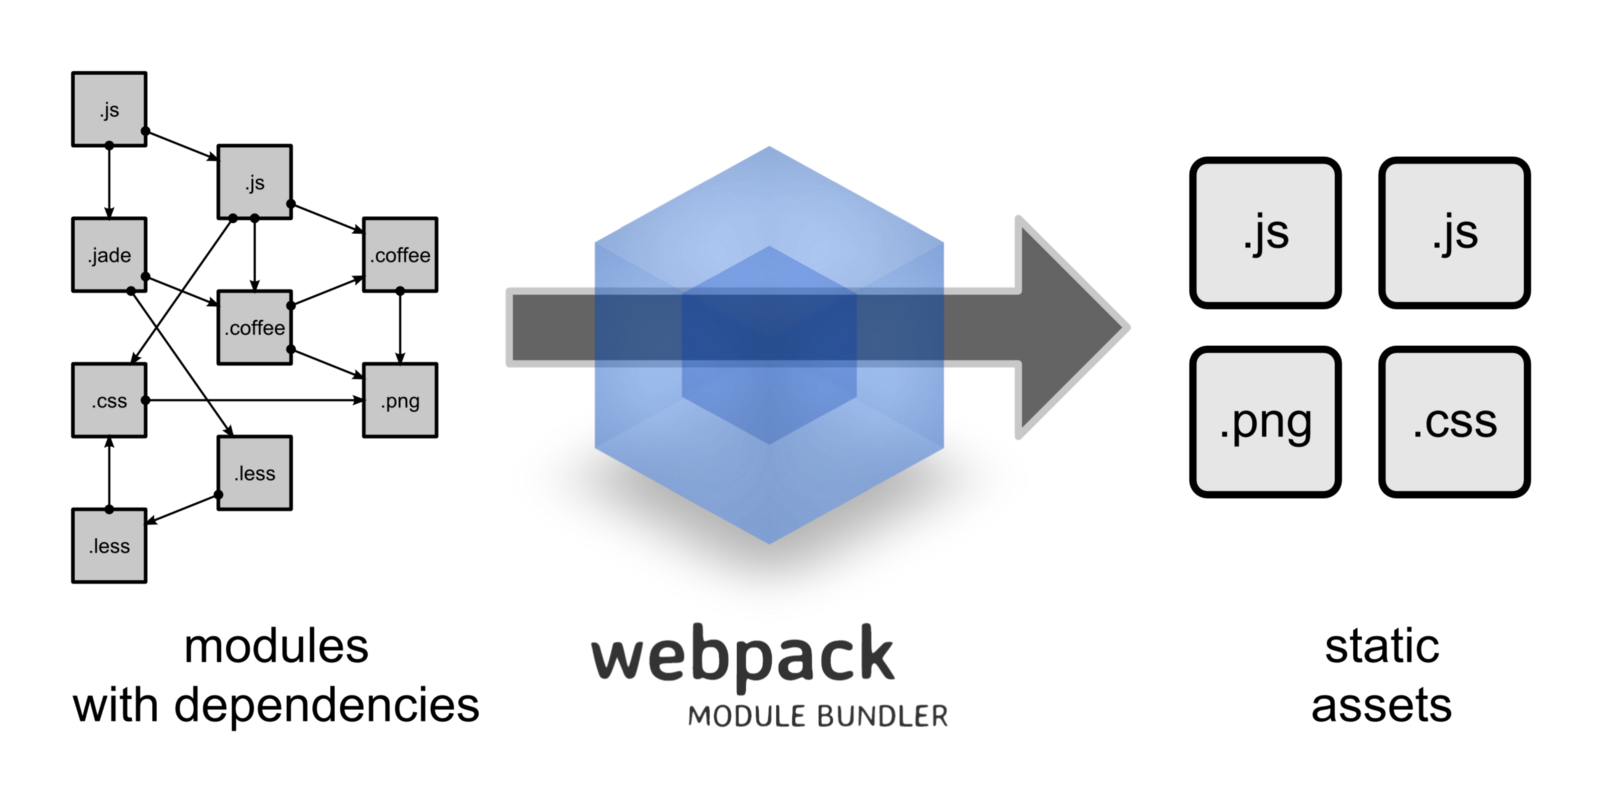
The great thing about Webpack is that it gets all the code and assets spread around many files and transforms them into single chunks that can be used as static assets. That means that it can use transpilers too, giving you the possibility of using fancy things like TypeScript, ES6 or Sass, without having to worry about how it’s going to work in the end, since it will all be transformed to something that browsers can properly read.
Let’s begin by adding Webpack and Vue as development dependencies
npm install --save-dev webpack vue
Installing a development dependency means that when we go to production, this dependency will not be installed by npm there, because we only need it at coding time. Npm will update our package.json to describe Webpack as a dev dependency, creating a devDependencies attribute, more less like this:
"devDependencies": {
  "vue": "^2.4.2",
  "webpack": "^3.4.1"
}
But wait a minute, why is Vue a development dependency? Isn’t it going to be used in production as well?
Yes, it will, but Webpack will only use its code at the time of transpiling, including it entirely together with our application’s code in one final file that can be used as a static asset.
webpack.config.js
We won’t go too far with Webpack without a configuration file, so let’s create one:
touch webpack.config.js
Let’s indicate to Webpack how we want our code to be processed:
 const path = require(‘path’);
  const webpack = require(‘webpack’);
  const APP_ABSOLUTE_PATH = path.join(__dirname, ‘app’);

  module.exports = {
    entry: path.join(APP_ABSOLUTE_PATH, ‘main.js’),
    output: {
      path: __dirname,
      filename: ‘bundle.js’
    }
  }
Basically, we’re specifying that our application starts at the main.js file and it should end in a file called bundle.js.
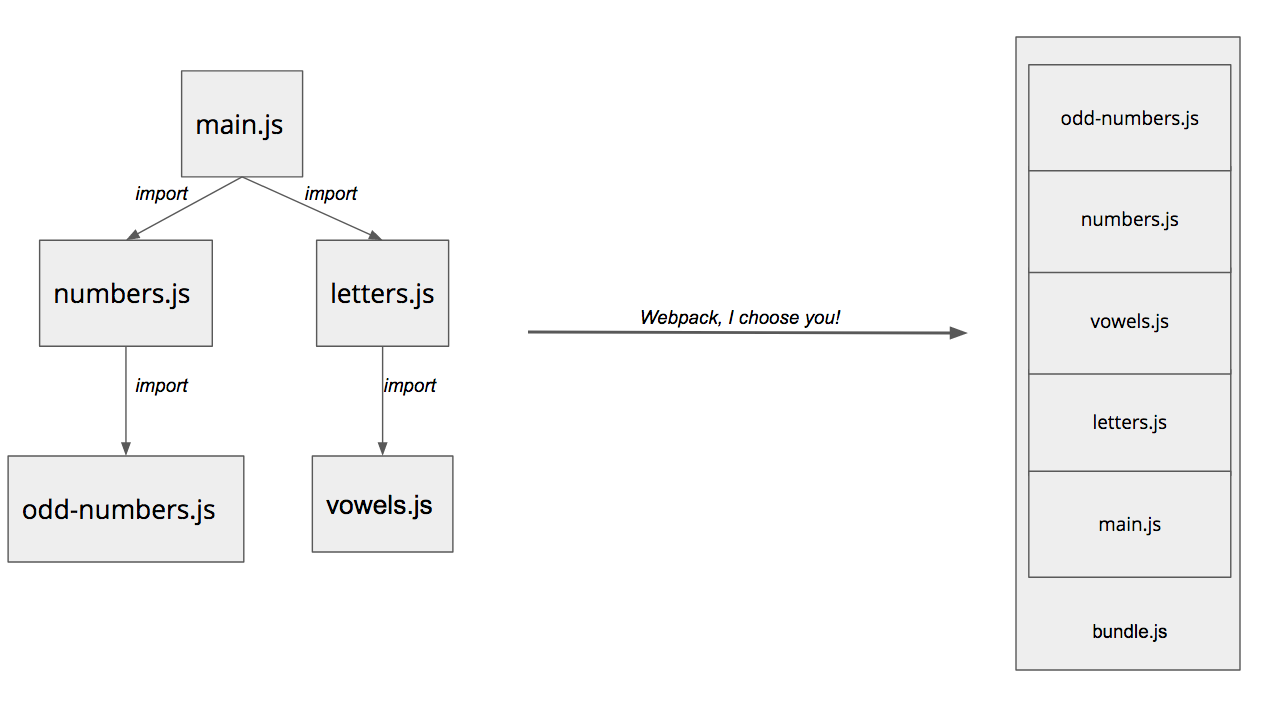
Webpack will start reading main.js in order to find import statements that indicate that main.js module/file depends on another module(s) to work and it will search for this imports recursively (meaning that if the imported module also has import statements, it will include those files as well) until it can build a complete graph of dependencies of our whole application.
Once the whole dependency graph is built, Webpack can start processing and joining all files/modules it found into a single js file that can be used as a static asset.
More less like the following illustration:

Please do note that this illustration is not accurate, it’s just an ugly analogy on how Webpack performs its shenanigans.
Ok, let’s give it a try:
./node_modules/.bin/webpack
Looks like it partially worked:

Even though we ended up with a bundle.js file with some content, Webpack still failed to parse our .vue file, and its error message is
telling us why:
You may need an appropriate loader to handle this file type
Out of the box, Webpack may understand a few things, like plain JavaScript and import statements, for instance, but it wont work with everything. In this situations, we need Webpack Loaders, that can be described as some sort of “functions” that know how to transform species of code that Webpack alone is not aware of.
The vue-loader⌗
Let’s add the loader that knows how to handle Vue, together with all its dependencies:
npm install --save-dev vue-loader vue-template-compiler css-loader
But wait, how do I know which dependencies a loader might have?
When you try to process a file with some loader with missing dependencies, Webpack will fail and the error message can give you the tips of what else is necessary.
Let’s tell Webpack to use our new vue-loader:
 const path = require(‘path’);
  const webpack = require(‘webpack’);
  const APP_ABSOLUTE_PATH = path.join(__dirname, ‘app’);
  module.exports = {
    entry: path.join(APP_ABSOLUTE_PATH, ‘main.js’),
    output: {
      path: __dirname,
      filename: ‘bundle.js’
    },
    module: {
      rules: [
        {test: /\.vue$/, loader: 'vue-loader'
      ]
    }
  }
In the updated config, we tell Webpack to use vue-loader to process all files whose names end with .vue. We could also use a sass-loader to process .sass files, for instance. It’s all up to you and how you want Webpack to do it.
Let’s give it another try now:
./node_modules/.bin/webpack
Looks like it finally worked:

Now we have a bundle.js. What to do with it?
The index.html file⌗
Let’s create an HTML file to run our code. In order to do that, we need this html to have two things:
- A script tag that adds bundle.js;
An element with id “vue-container” which is the element specified when we initialised Vue in main.js;
touch index.html
Remember to add the Vue container specified in our main.js. That would be an element with id vue-container:
  <html>
     <head>
         <meta content=”text/html; charset=utf-8" />
         <title>Vue Components</title>
     </head>
      <body>
          <div id=”vue-container”> </div>
      </body>
      <script src="./bundle.js"></script>
  </html>
Now, if we open the html file, we should see a masterpiece:

Where is Babel?⌗
We mentioned Babel as the tool that transpiles code, and that Webpack can use it to transpile your things, but we did not actually use it to
process our component and our main.js, which uses import statement from ES6. Why did it still work? That’s because vue-loader can handle
all you need when writing components and Webpack can understand import and export statements out of the box, but those are the only ES6+
statements that it can understand without a transpiler. If you want to go further
with ES6 in your code, you must use a transpiler with Webpack.
One last fun fact⌗
You don’t need Webpack to handle your Vue templates if you don’t want to, because it will give you countless valid ways to write templates (like x-templates, inline-templates or render functions ) without actually needing to transpile your code or writing gigantic strings.
Conclusion⌗
The whole point of this article is not to help anyone decide which tool to use, or which one is better, the point is to show a nicer way to start learning both of them when you know nothing about all the shenanigans of the current JavaScript. I personally believe that learning such tricks should be the first step into this new way of writing front-end applications, regardless of what library or framework you intend to use in the future.